

Let me give you a number that changed how I design my camp sleep systems: 37 degrees Fahrenheit.
That’s the internal body temperature at which hypothermia begins. Not minus-ten. Not a blizzard. Thirty-seven degrees a temperature you can hit in a poorly configured sleeping bag on a cool September night without any dramatic weather involved. I’ve seen it happen to experienced campers who thought their gear was adequate because it worked fine last summer.
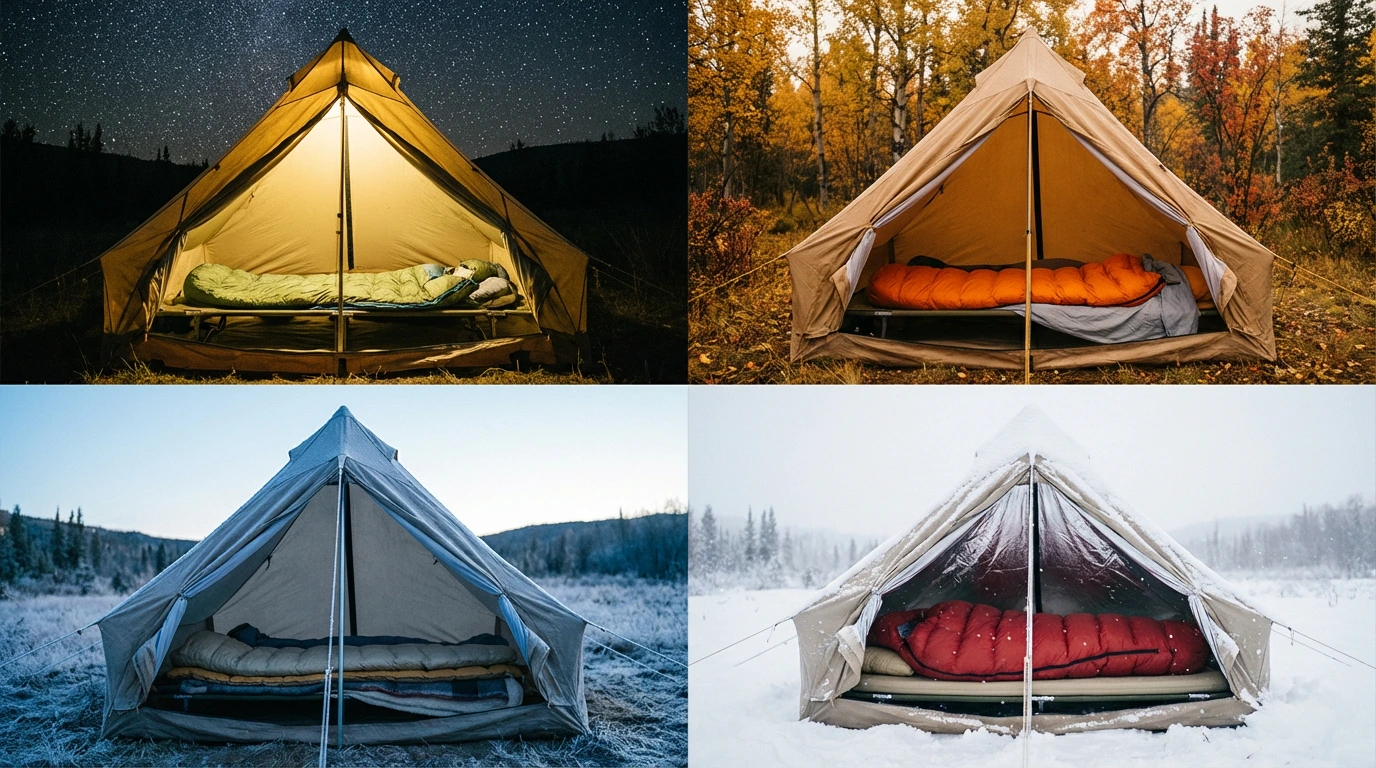
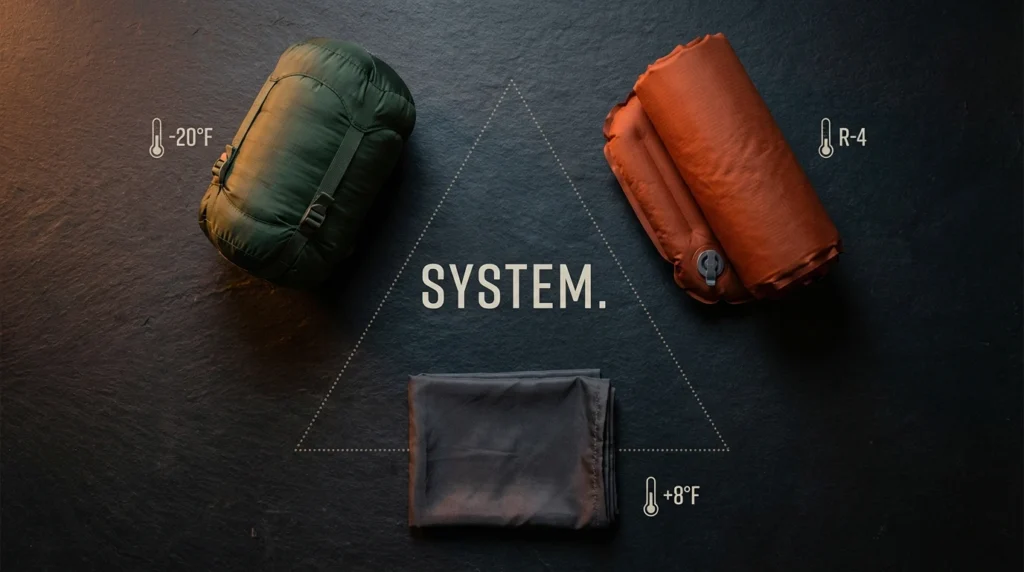
The difference between a sleep system and a sleeping bag is the difference between engineering and wishful thinking. A sleeping bag is one component. A sleep system is three components bag, pad, and liner working as a coordinated thermal unit. Get all three right, and you can sleep comfortably year-round with the same core gear. Get one wrong, and it doesn’t matter how expensive the others are.
After nearly two decades of designing and testing sleep systems across every season on six continents, this is the framework I actually use.
Stop Thinking “Sleeping Bag,” Start Thinking System
The most expensive mistake in sleep system buying is treating the three components independently.
Your sleeping bag insulates your top half. Your sleeping pad insulates your bottom half and this distinction is critical. Cold ground conducts heat away from your body up to 25 times faster than cold air. A $600 down sleeping bag rated to 0°F will leave you shivering on cold ground if the pad underneath it has an inadequate R-value. The bag and pad must be matched to each other, not just to the temperature.
The liner adds a third variable: a removable thermal buffer that modifies the system’s effective rating by 5 to 15°F depending on type. Together, these three components create a modular system you can reconfigure seasonally adding or removing the liner, swapping pad thickness, without buying entirely new gear every time the calendar changes.
This same layering logic mirrors what I teach about shelter selection. Whether you’re inside a dome or cabin tent or under a tarp or alternative shelter, the sleep system is what actually keeps you alive when the temperature drops. The tent keeps weather out. The sleep system keeps warmth in.
Sleeping Bag Temperature Ratings: What the Numbers Actually Mean
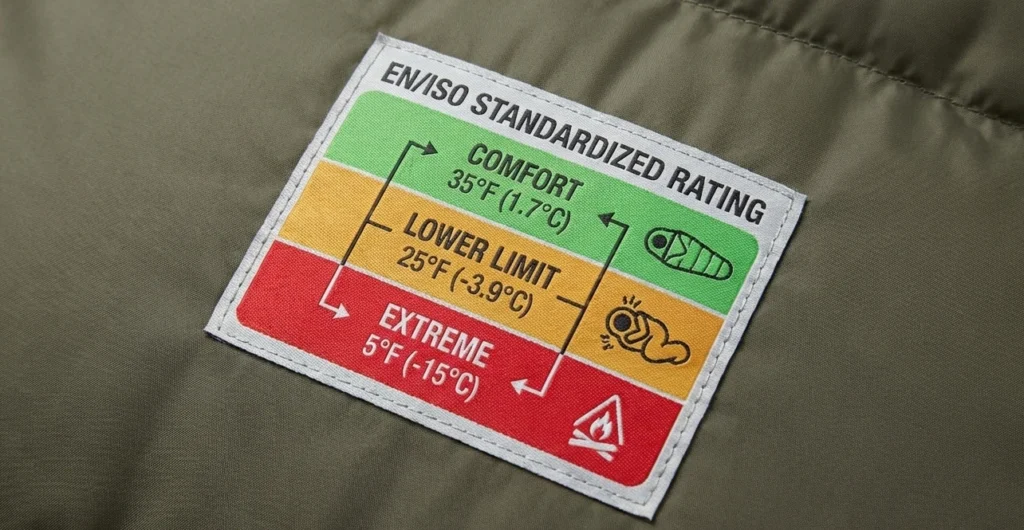
Every quality sleeping bag sold today carries either an EN 13537 or ISO 23537 standardized temperature rating the result of laboratory testing using a thermal mannequin under controlled conditions. Understanding what these ratings represent prevents the most common gear purchasing mistake in camping.
Comfort Rating: The temperature at which a standard adult woman sleeps comfortably in a relaxed position. This is the safe, conservative number for most recreational campers.
Lower Limit Rating: The temperature at which a standard adult man sleeps comfortably in a curled position. This is the number manufacturers typically advertise.
Extreme Rating: The survival threshold the temperature at which hypothermia risk becomes serious. This is not a comfort rating. It is a “you will survive if nothing else goes wrong” rating. Never use it as a target.
The practical implication: if you run cold, buy to the Comfort rating, not the Lower Limit. If you’ll be camping near the Lower Limit temperature, you’re depending on perfect conditions no wind, no moisture, adequate pad R-value to stay comfortable. The smarter strategy is to buy one rating colder than your target temperature and use a liner to warm up the system in milder conditions.
Down vs Synthetic: The Seasonal Calculation
This debate has largely been settled by real-world use, but context still matters enormously.
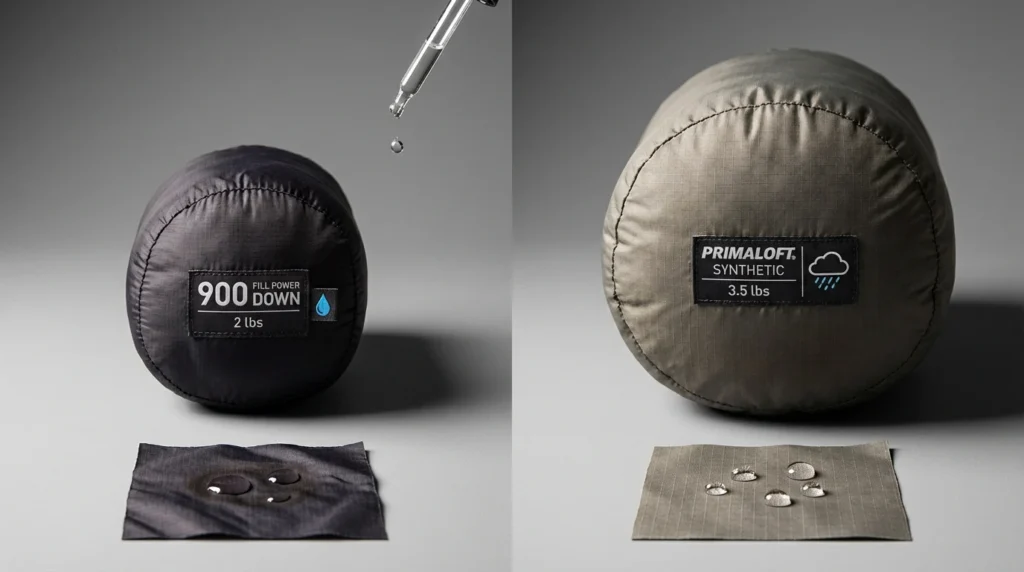
Down insulation (measured in fill power, typically 600 to 900+) delivers the best warmth-to-weight ratio available. A 900-fill-power down bag compresses to the size of a large water bottle and weighs under 2 pounds for a 20°F rating. Nothing synthetic matches this combination. The weakness everyone knows: wet down collapses and loses virtually all insulating value.
Hydrophobic down : down treated with a DWR coating at the fiber level has substantially closed this gap. Brands like Western Mountaineering, Feathered Friends, and REI’s Co-op series offer hydrophobic treatments that resist moisture absorption for a genuinely longer period than untreated down. For three-season use in most environments, modern hydrophobic down is the right call.
Synthetic insulation (PrimaLoft, Climashield, PolyCo) retains meaningful warmth when wet perhaps 60 to 70% of its dry performance because the fibers don’t collapse when saturated. For winter camping in the Pacific Northwest, sea kayaking, or any environment with persistent high humidity, synthetic bags provide a genuine safety margin that down cannot. The trade-off: heavier, bulkier, and with a shorter effective service life as the fibers break down through compression over years.
My personal system: a hydrophobic down bag for three-season and dry winter use, and a synthetic bag specifically for wet Pacific coastal trips.
Sleeping Pads: R-Value Is Not Optional Information
The R-value measures a pad’s resistance to heat flow specifically, how effectively it prevents your body heat from escaping into the ground beneath you. Higher R-value means better insulation.
The Outdoor Industry Association standardized R-value testing in 2020, meaning numbers from different manufacturers are finally directly comparable. Use this scale as your guide:
- R-1 to R-2: Summer only warm ground, temperatures above 50°F consistently
- R-2 to R-3: Three-season spring through fall in temperate climates
- R-4 to R-5: Cold-weather camping consistent temperatures below 20°F
- R-5 and above: Winter and snow camping
The critical technique most campers don’t know: R-values stack additively. Placing a closed-cell foam pad (R-2) under an inflatable pad (R-3) produces approximately R-5 in combined insulation. This stacking approach saves money foam pads cost $25 to $40 and add no puncture risk and provides critical backup if the inflatable develops a leak in sub-freezing conditions.
Foam vs Inflatable:
Closed-cell foam pads (like the Therm-a-Rest Z Lite Sol) are indestructible, lightweight, and function as emergency gear in multiple ways sitting pad, splint backing, windbreak. They’re bulky but bulletproof. Inflatable pads (Therm-a-Rest NeoAir, Sea to Summit Ether Light) deliver far greater comfort and compressibility but introduce puncture vulnerability. For winter and technical camping, I always bring both.
Width matters too. Standard 20-inch pads leave most adults’ shoulders or hips off the edge during sleep movement, defeating insulation at exactly the contact point where cold ground conduction is greatest. A 25-inch wide pad eliminates this problem entirely.
Sleep Liners: The Cheapest Performance Upgrade in Camping
A sleep liner is a fabric insert worn inside your sleeping bag that adds warmth, extends the bag’s clean life, and can function as a standalone sleep layer in warm conditions. For the weight and cost involved typically 3 to 10 ounces and $30 to $80 nothing else in your kit delivers comparable versatility.
Liner materials determine both warmth addition and moisture management:
Silk liners add 5 to 8°F, weigh under 3 ounces, pack to nothing, and feel genuinely luxurious. They dry fast and compress small enough to forget they’re in your pack. The Cocoon Mummy Liner in silk is the one I recommend for backpacking.
Merino wool liners add 8 to 12°F and share merino’s famous odor resistance relevant on multi-week trips where bag washing isn’t possible. Heavier than silk but more durable.
Thermolite and fleece liners add 15°F or more, making them legitimate thermal modifiers rather than just hygiene layers. The Sea to Summit Reactor Extreme pushes 15°F of additional warmth in a surprisingly compact package at that performance level, it bridges the gap between a 3-season and winter-capable system.
The practical strategy: own a 20°F three-season bag and a quality Thermolite liner. That combination covers you from summer through shoulder-season cold snaps, and the liner removes for hot nights. Add a foam pad stacked under your inflatable when temperatures push below 20°F and you have a functional four-season system without buying a dedicated winter bag.
Building Your Four Configurations
Summer (50°F+):
- Liner only, or 40°F bag with liner removed
- R-2 inflatable pad
- Leave the heavy bag at home entirely
Three-Season / Shoulder (20°F–50°F):
- 20°F bag + silk or merino liner as needed
- R-3 to R-4 inflatable pad
- Standard complete camp sleep system configuration
Cold-Weather (0°F–20°F):
- 20°F bag + Thermolite liner (effective to approximately 5°F)
- R-4 inflatable + R-2 foam pad stacked (effective R-6)
- Pay close attention to your camping layering system wearing a base layer and down booties inside the bag adds 5 to 10°F of warmth cost-free
Winter / Sub-Zero:
- Dedicated 0°F or lower down bag
- R-6+ pad setup (dedicated winter pad or stacked system)
- Vapor barrier liner for extreme cold to prevent moisture migration into down
- Sleep with power bank and water filter inside bag to prevent freezing the same gear care principle that governs your camping lighting and power gear in cold weather
Seasonal Configuration at a Glance
| Season | Temp Range | Bag Rating | Liner | Pad R-Value | System Weight |
|---|---|---|---|---|---|
| Summer | 50°F+ | 40°F bag or liner only | None or silk | R-1.5 to R-2 | 1.5–2.5 lbs |
| Three-Season | 20°F–50°F | 20°F bag | Silk or wool (+5–8°F) | R-3 to R-4 | 3–4.5 lbs |
| Cold-Weather | 0°F–20°F | 20°F bag | Thermolite (+15°F) | R-4 + R-2 foam stacked | 4.5–6 lbs |
| Winter | Below 0°F | 0°F or colder bag | Thermolite or vapor barrier | R-6+ | 6–9 lbs |
Care and Storage: Protecting the Investment
Down sleeping bags fail through one cause more than any other: improper storage. Compressing a down bag in its stuff sack between trips destroys the cluster structure that creates loft and loft is warmth. Always store down bags loosely in a large cotton or mesh storage sack, hung or lying flat [see tools and maintenance guide for full gear care protocols].
Wash sleeping bags with Nikwax Down Wash Direct or Grangers Down Wash in a front-loading machine on a gentle cycle. Never top-loading machines, the agitator tears baffles. Tumble dry on low heat with two clean tennis balls to break up clumping down clusters. A bag that sounds crinkly when compressed has oil and skin contamination blocking the down, wash it.
Synthetic bags store compressed without penalty but develop permanent compression spots over time. Rotate the compression orientation between trips if storing in a stuff sack long-term.
Your sleep system represents the most critical safety equipment in your entire camping kit, more important than your tent and shelter choice, more important than your cutting tools, more important than your backpack carrying system. You can survive a long, uncomfortable night in the wrong tent. You cannot comfortably survive a long, cold night in the wrong sleep system.
Build it deliberately. Maintain it carefully. It will outlast everything else in your pack.