


There’s a moment every hiker dreads, you glance down at your phone, and the GPS is spinning uselessly, battery at 3%, trail junction nowhere in sight. I’ve been there, standing in the Cascades at dusk, fog rolling in, realizing that the little red needle in my shirt pocket was the only thing standing between me and a very cold, very unplanned night out. That compass saved me. Knowing how to use it made all the difference.
Not everyone know how to use a compass. You align the magnetized needle with the orienting arrow to establish your heading, then adjust for magnetic declination to get an accurate bearing. Master that sequence, and you can orient a map, track precise headings, and pinpoint your exact location, no satellite signal required.
Understanding Your Gear : The Anatomy of a Navigation Compass
Before you can trust a compass, you need to understand what each part actually does. Most hikers grab one, stare at the spinning needle, and hope for the best. Don’t be that person.
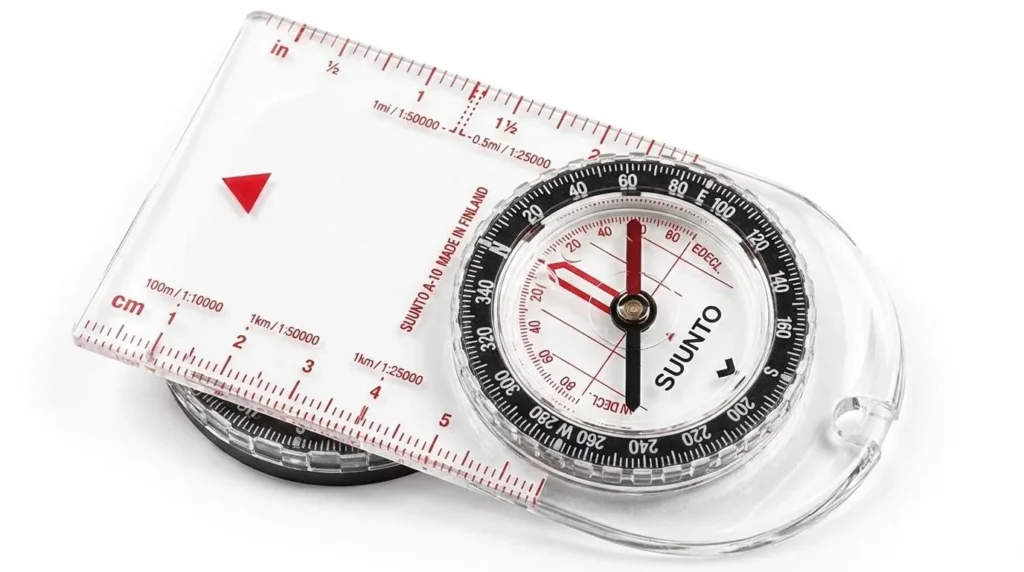
A quality baseplate compass has five core components, each with a specific job:
| Part | Primary Function | Why It Matters |
|---|---|---|
| Baseplate | Clear platform with straight edges | Allows map visibility and bearing lines |
| Rotating Bezel | “Azimuth ring” marked 0–360° | Sets and reads specific bearings |
| Magnetized Needle | Points to magnetic north (Red/White) | The engine, powered by Earth’s magnetic field |
| Direction-of-Travel Arrow | Fixed arrow on baseplate | Shows which way to walk once bearing is set |
| Orienting Arrow | Outline shaped to fit the needle | Used to “box the needle” and orient your compass |
The relationship between these parts is what makes navigation possible. Think of the baseplate as your drafting table, the bezel as your protractor, and the needle as the one honest thing in your pack that never lies to you.
The “100-Foot Rule” : Why Magnetic Declination is Non-Negotiable
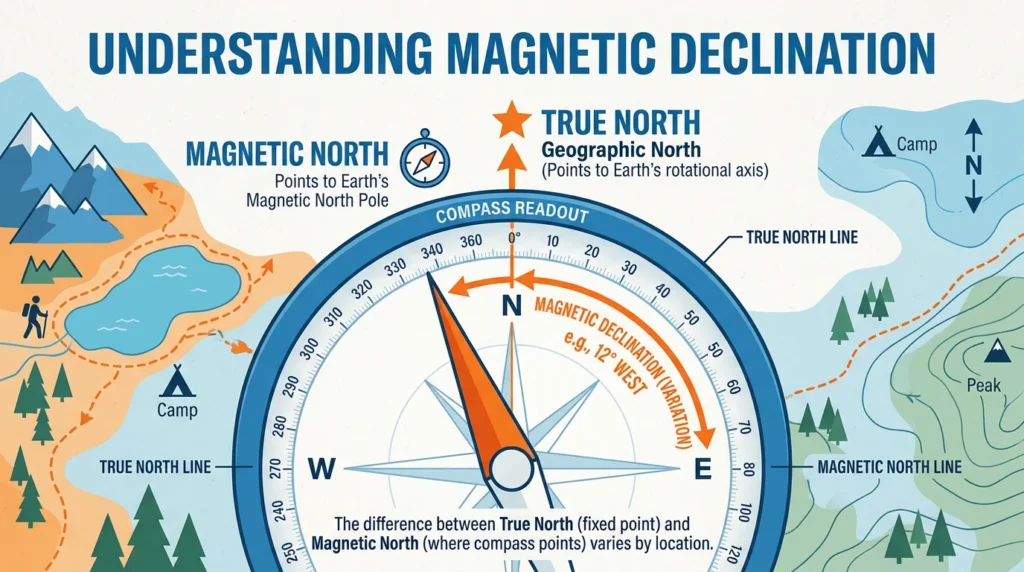
Here’s where most beginners go wrong, and where experienced hikers sometimes get lazy. Magnetic declination is the angular difference between true north (where maps point) and magnetic north (where your compass needle actually points). Across the continental U.S., that variance swings from roughly 20° East in Washington State to 20° West in Maine.
Why does that matter? A single degree of error translates to about 100 feet of drift per mile traveled. Chase a wrong bearing for five miles through dense forest, and you’re nearly half a football field off course, in every direction. That’s the difference between finding your campsite and spending the night under a tree you didn’t plan on.
As Lindsay McIntosh-Tolle, a former REI Outdoor Instructor, puts it: “A compass relies only on Earth’s magnetic fields… batteries can die and gadgets can malfunction.” She’s right. Declination isn’t a technicality, it’s the difference between navigation and wandering.
Before any trip, look up your area’s current declination on NOAA’s website. If your compass has an adjustable declination dial (and most quality ones do), set it before you leave the trailhead. Then forget about it, the compass corrects automatically from that point on.
Step 1 : Orienting Your Map to the Real World
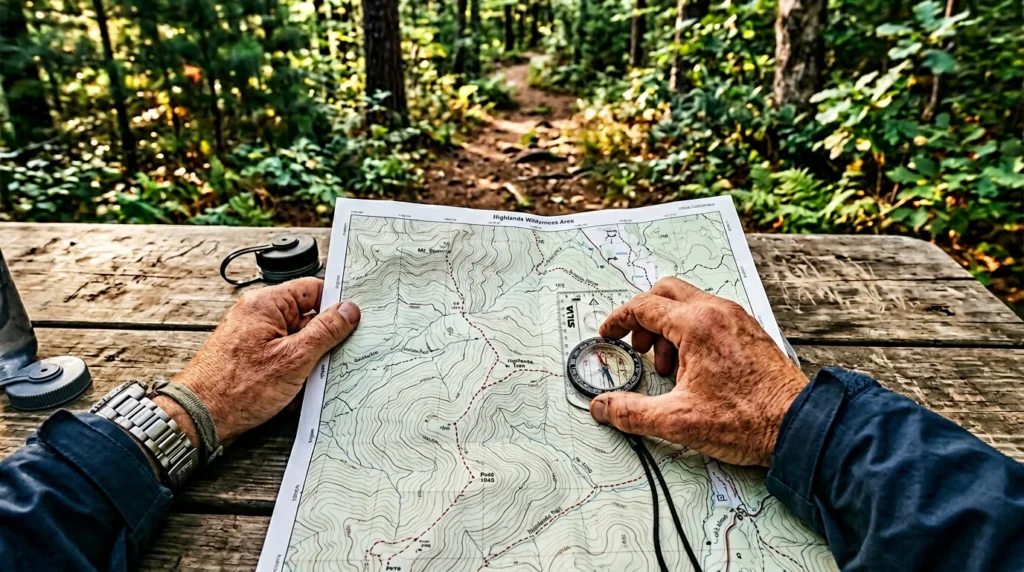
An unoriented map is just a pretty picture. Orienting it means aligning it with the actual terrain around you, so the river on paper is the river on your left, and the ridge shown above you is the ridge actually above you.
To do this accurately, you need a compass with a clear baseplate, one where you can see the map underneath while working. [Shop Professional Baseplate Compasses for Precision Mapping.]
The process is straightforward once you’ve done it a few times:
- Place your compass flat on the map with the direction-of-travel arrow pointing toward the top (true north on the map).
- Rotate the bezel until the “N” aligns with the direction-of-travel arrow, you’re setting the compass to north.
- Now rotate your entire body, map and compass together, until the magnetized needle sits inside the orienting arrow. Navigators call this “boxing the needle” or putting it “in the doghouse.”
When that needle is boxed, your map matches the world. The terrain features on paper now correspond to what’s physically around you. It sounds simple, and honestly, it is, but doing it by feel in rain or low light takes practice. Do it at home first. Do it in your driveway. Do it until it’s muscle memory.
Step 2: How to Take and Follow a Bearing
Taking a Bearing from a Map

When you know your position and want to navigate to a destination, lay your compass on the map with the baseplate edge connecting your current location to your target. Rotate the bezel until the orienting lines inside align with the map’s north-south grid lines, needle not involved yet. Read the bearing at the index line on the baseplate. That number is your heading.
Now lift the compass off the map, hold it level in front of you, and rotate your body until the needle boxes inside the orienting arrow. The direction-of-travel arrow now points exactly where you need to go. Pick a landmark in that direction, a distinctive tree, a rocky outcrop, anything, walk to it, and repeat.
Taking a Bearing in the Field
Sometimes you spot a peak or a distant feature and want to know your bearing relative to it. Point your direction-of-travel arrow at the landmark, hold the compass level, and rotate the bezel until the needle boxes. The number at the index line is your bearing to that landmark. Write it down. You’ll need it for triangulation later.
For field bearings, a mirror compass like the Suunto MC-2 genuinely earns its extra cost. The hinged mirror lets you sight the landmark and read the bezel simultaneously, cutting sighting error roughly in half. [Upgrade to a Mirror Compass for 2x Sighting Accuracy.] I resisted buying one for years. Now I won’t navigate without it.
Advanced Navigation: Triangulation and “Staying Found”
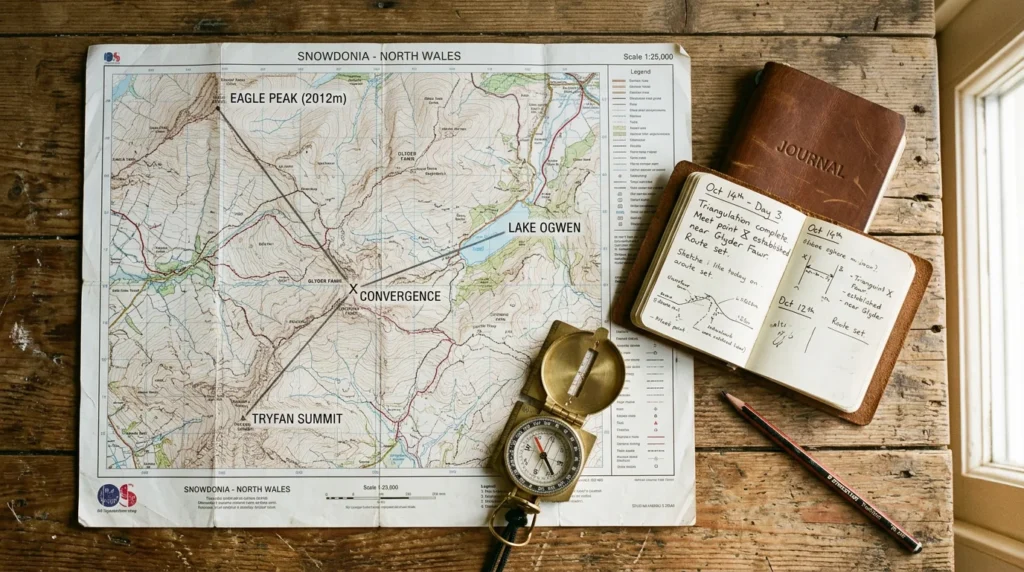
Triangulation sounds intimidating. It’s not, it’s just using what you can see to figure out where you are on paper. This skill matters most when you’re off-trail, which is exactly when you most need it.
Find two or three recognizable landmarks visible from your position, a distinct summit, a lake shore, a radio tower. Take a field bearing to each one, then transfer those bearings onto your map by drawing lines from each landmark outward. Where those lines converge is your location.
If your lines form a neat triangle instead of a single intersection point, don’t panic, that’s normal and is called the “triangle of error.” Your position sits somewhere inside it. A small triangle is acceptable. A large one means recheck your bearings, because a significant error crept in somewhere.
The navigators’ mantra is “stay found” rather than “get found.” Check your map regularly. Take bearings before you need them. Orient at every junction. Triangulate when you’re unsure, not when you’re lost.
Comparison: Which Compass is Right for Your Adventure?

| Model | Best For | Key Feature |
|---|---|---|
| Suunto A-10 | Beginners / Day Hikers | Simple, reliable baseplate- nothing to confuse you |
| Suunto M-3 | Advanced Navigators | Detailed scales designed for topo map work |
| Suunto MC-2 | Wilderness Explorers | Integrated mirror for precise field sighting |
Honestly, start with the A-10 if you’re learning. Graduate to the MC-2 when you’re spending nights off-trail. The M-3 sits in a useful middle ground for map-heavy navigators who don’t need mirror sighting.
Navigation FAQ : Expert Answers to Common Questions
Can I just use my phone’s compass?
You can, until you can’t. Phone batteries die, screens crack in cold weather, and electronics fail at the worst moments. A manual compass is one of the original “Ten Essentials” for wilderness survival for good reason, it has no moving parts to break and no battery to drain.
How often does magnetic declination change?
It shifts gradually as Earth’s magnetic field evolves. The change is slow but real, over a decade, it can move several degrees in some regions. Always check NOAA’s online declination calculator with your specific coordinates before any significant trip.
What if I lose my map?
A compass without a map is a sophisticated way to walk in a consistent wrong direction. Always carry a paper topographic map of your area, stored in a waterproof bag. A compass is half the navigation system, the map is the other half.